Before using the the BeanFactory in our Spring tutorial, let's first
look into details of the this.
There are 2 important packeges in the Spring
which provides Inversion of Control (alternately called Dependency Injection)
features.The BeanFactory provides an advanced configuration mechanism capable
of managing beans (objects) of any nature, using potentially any kind of
storage facility.
- org.springframework.beans
- org.springframework.context

The BeanFactory is the actual container which instantiates, configures,
and manages a number of beans. These beans typically collaborate with one
another, and thus have dependencies between themselves. A BeanFactory is
represented by the interface org.springframework.beans.factory.BeanFactory, for
which there are multiple implementations. The most commonly used simple
BeanFactory implementation is
org.springframework.beans.factory.xml.XmlBeanFactory. We need to instantiated
the object mannually, this can be achieved as mentioned below.
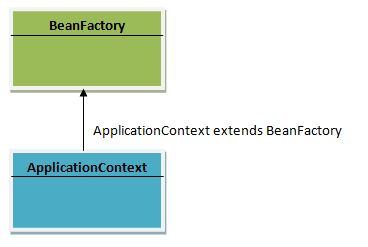
ApplicationContexts are a subclass of BeanFactory, and most users end up
using XML variants of ApplicationContext
BeanFactory factory=new XmlBeanFactory(new
FileSystemResource("Beans.xml"));
Let's understand above feature with the program.
Create a Java project with your desired name Let's say
"springTutorial".
Add the required spring lib files, if you want to take reference, please
follow Spring Tutorial 02 -My First 'Hello World' Program in Spring blog.
Create a package with name
"org.javaIsEasy.springBeanFactoryExample".
Create a class with name of "Area.java".
Write below code in this file.
**********************************************************************
package org.javaIsEasy.springBeanFactoryExample;
public class Area {
public void calculateArea()
{
System.out.println("Area
Has been calculated");
}
}
**********************************************************************
now create another class in the same package with name of
"CallAreaApplication.java".
Write below code in this file.
**********************************************************************
package org.javaIsEasy.springBeanFactoryExample;
import org.springframework.beans.factory.BeanFactory;
import org.springframework.beans.factory.xml.XmlBeanFactory;
import org.springframework.core.io.FileSystemResource;
public class CallAreaApplication {
public static void main(String[] args) {
BeanFactory factory=new XmlBeanFactory(new
FileSystemResource("Beans.xml"));
Area
area=(Area)factory.getBean("area");
area.calculateArea();
}
}
**********************************************************************
Now create a "Bean.xml" file, in which we write beans mapping.
Put this file in the Root folder.
write below code in the Beans.xml file.
**********************************************************************
<?xml version="1.0" encoding="UTF-8"?>
<beans xmlns="http://www.springframework.org/schema/beans"
xmlns:xsi="http://www.w3.org/2001/XMLSchema-instance"
xsi:schemaLocation="http://www.springframework.org/schema/beans
http://www.springframework.org/schema/beans/spring-beans-3.0.xsd">
<bean id="area"
class="org.javaIsEasy.springBeanFactoryExample.Area">
</bean>
</beans>
**********************************************************************
Structure of the project.

Now let's run this program and what results comes. Open
'CallAreaApplication.java' file---> right click---> run as java
application.
Output:
**********************************************************************
17 Jun, 2013 11:21:59 PM
org.springframework.beans.factory.xml.XmlBeanDefinitionReader
loadBeanDefinitions
INFO: Loading XML bean definitions from file [C:\DATA\work\WorkSpace_Spring\SpringTutorial\Beans.xml]
Area Has been calculated
**********************************************************************
'Area Has been calculated' is printed in the output.
No comments:
Post a Comment