There is very easy way to apply caching in WSO2 DSS
using console UI. Whenever we create a data service which interacts with the
database and if we realize that database is not being change very frequently
then Caching can be used. We have to set caching time in this UI configuration by which request will not go
to database each time (within the caching time), this way we can optimize our solution and reduce the response
time of the service as well.
In
this blog we will set a caching in a data service which has been created with
Mysql database which fetches the employee data from the database. If you have to
see that how this service is created then go to my first DSS Blog.
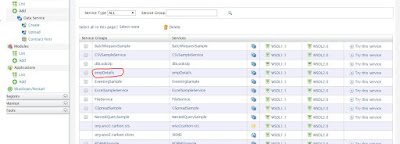
Here is the list of different service but we have to
put caching only in empDetail data service. To apply caching click on this
service, it will open below page.
Again click on this empDetail service, it will redirect
to you below page.
In this page there are different option but you have to
choose Response Caching option, once you click this you will be rediredted to
below page.
There is a drop down button in which you have to choose ‘Yes’ to enable cache. After
selecting YES, it will go to below page.
In this page basically, you have to put caching time
and maximum caching size on number and other details as well. You can set this
time to 1 hour, 1 day as required.
Click on finish button to enable caching.
One caching is enabled above page will pop up with
successful message.
If you restart the server then the first hit will go to the
database and first hit’s data will be cached and DSS will be reusing this data
until caching time gets expired then again it follow the same process.
Make sure whenever you apply caching, restart your DSS
server for the best practice.


No comments:
Post a Comment