Logic app has many connectors to integrate with. I am going to talk about SendGrid third party connector in this blog. SendGrid is used to send emails, good thing about it that you get 100 emails/day free to play with. You can get more idea about SendGrid from its website https://sendgrid.com/
We are
going to create a Logic APP which will call SendGrid connector and send an
email to user.
SendGrid Account:
We have to
create a SendGrid account in order to connect it with Logic APP. I am using
free one, but you can create a paid one which has more feature obviously.
· Signup with SendGrid
· Verify your user account and sender
email, you can follow the process from its website
· After login you can see “API Keys”
on left hand side menu bar
· Create an API Key
· Check your level, I have given full
access.
· You will get the Key but make sure
you copy this otherwise it won’t be visible again and you have to create a new
one.
Logic APP:
· Create a Logic APP, I have created a
consumption based with name of “send-email-sendgrid”
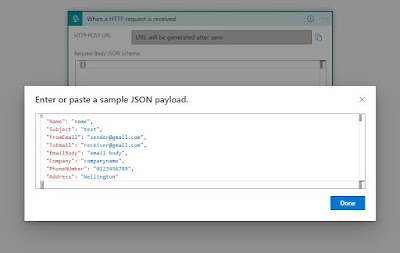
· Use Trigger as HTTP as mentioned
below
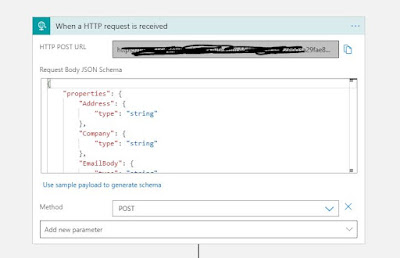
· Once selected as HTTP, you need to
pass request payload schema, I don’t have one so created by providing the JSON
sample
{
   "Name":"name",
   "Subject":"test",
   "FromEmail":"sender@gmail.com",
   "ToEmail":"receiver@gmail.com",
   "EmailBody":"email body",
   "Company":"companyname",
   "PhoneNUmber":"0123456789",
   "Address":"Wellington"
}
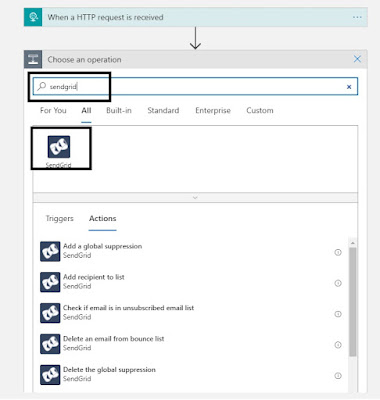
· Click on “New Step” and search
“SendGrid” connector in it.
· Click on “Send Email (V4)” action as
per below screenshot
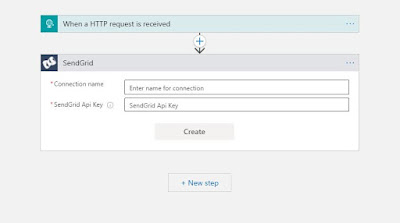
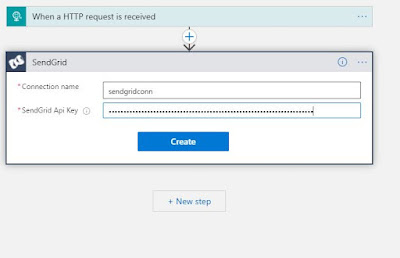
· You will be asked to create a
connection
· Give a connection name and the Key
value which was created in earlier step in SendGrid account
· I have given connection name as
“sendgridconn” and pasted my SendGrid API key
· Click on “Create” button
· Once connection is created you will
see below window, where you have to provide email details
· As soon as you click on any textbox
you will see below window and select respective parameter
· In case you don’t see this click on
“see more” link
· Make sure you assign right parameter
on right place as these are dynamic parameters which will come from the JSON request.
· Now you can add one more connector
so that we can send response back to consumer.
· Search “Response” in connector
window and choose “Response” connector as per above screenshot
{
   "status": "Email has been sent successfully to @{triggerBody()?['Name']}"
}
· Save the logic app and go to HTTP
connector, it will create a HTTP URL for you to trigger this Logic APP
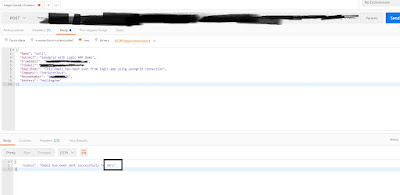
· Open your favorite API testing tool
and try to test it, I am using POSTMAN tool.
· Pass the below payload for testing
and change the values accordingly
{
   "Name":"name",
   "Subject":"test",
   "FromEmail":"<sender_email>",
   "ToEmail":"receiver_email",
   "EmailBody":"email body",
   "Company":"companyname",
   "PhoneNUmber":"0123456789",
   "Address":"Wellington"
}
· You can see
the process from Logic APP run history
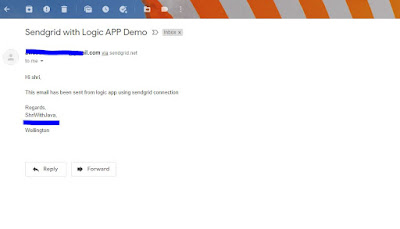
· And if
everything goes fine, you should be receiving an email as similar to below one.






No comments:
Post a Comment