Before writing any program in spring, let’s first setup our Spring
environment in eclipse.
Step 1 - Create Java Project:
The first step is to create a simple Java Project using Eclipse. Go to
the option File -> New -> Project and select Java Project from the wizard
list.
Now name your project as ‘SpringTutorial_02’ using the wizard window as
follows:
The structure of the project would be like as follows.
Step 2 - Add Required Libraries:
Now we need to add the libraries of spring to give support of the spring
in this project. Select the project ---> Right Click --->Property
--->Java Build Path as follows.
Now add the spring libraries.
List of Libraries.
- antlr-runtime-3.0.1
- org.springframework.aop-3.1.0.M2
- org.springframework.asm-3.1.0.M2
- org.springframework.aspects-3.1.0.M2
- org.springframework.beans-3.1.0.M2
- org.springframework.context.support-3.1.0.M2
- org.springframework.context-3.1.0.M2
- org.springframework.core-3.1.0.M2
- org.springframework.expression-3.1.0.M2
- commons-logging-1.1.1
Step
3 - Create Source Files:
Now let’s create source files in this
project. First we need to create a package called org.javaIsEasy.springTutorial.
To do this, right click on src in package explorer section and follow the
option : New -> Package. Next we will create HelloWorld.java and
MainClass.java files under the org.javaIsEasy.springTutorial package.
HelloWorld.java
package org.javaIsEasy.springTutorial;
public class HelloWorld {
private String message;
public void setMessage(String
message){
this.message =
message;
}
public void getMessage(){
System.out.println("Your Message : " + message);
}
}
MainClass.Java
package org.javaIsEasy.springTutorial;
import
org.springframework.context.ApplicationContext;
import
org.springframework.context.support.ClassPathXmlApplicationContext;
public class MainClass {
public static void main(String[] args) {
ApplicationContext context = new ClassPathXmlApplicationContext("org/javaIsEasy/springTutorial
/Beans.xml");
HelloWorld obj = (HelloWorld) context.getBean("helloWorld");
obj.getMessage();
}
}
***********************************************************************************
Java files have been created now we
need to create
There are following two important
points to note about the main program:
- First step is to create application context where we used framework API ClassPathXmlApplicationContext(). This API loads beans configuration file and eventually based on the provided API, it takes care of creating and initializing all the objects ie. beans mentioned in the configuration file.
- Second step is used to get required bean using getBean() method of the created context. This method uses bean ID to return a generic object which finally can be casted to actual object. Once you have object, you can use this object to call any class method.
Step
4 - Create Bean Configuration File:
You need to create a Bean Configuration
xml file which would be created in org.javaIsEasy.springTutorial package.
We have given 'Beans.xml' to this
configuration file. We can give any name to this file as we want to. Only the
classpath and the name of this configuration file needs to be maintained which
is being used in the java files.
The Beans.xml is used to assign unique
IDs to different beans and to control the creation of objects with different
values without impacting any of the Spring source files. For example, using
below file you can pass any value for "message" variable and so you
can print different values of message without impacting HelloWorld.java and
MainClass
After creating the Beans.xml file, our
project structure would be as follows.
Beans.xml
<?xml version="1.0"
encoding="UTF-8"?>
<beans xmlns="http://www.springframework.org/schema/beans"
xmlns:xsi="http://www.w3.org/2001/XMLSchema-instance"
xsi:schemaLocation="http://www.springframework.org/schema/beans
http://www.springframework.org/schema/beans/spring-beans-3.0.xsd">
<bean
id="helloWorld"
class="org.javaIsEasy.springTutorial.HelloWorld">
<property
name="message" value="Java Is Easy !!"/>
</bean>
</beans>
When Spring application gets loaded
into the memory, Framework makes use of the above configuration file to create
all the beans defined and assign them a unique ID as defined in <bean>
tag. You can use <property> tag to pass the values of different variables
used at the time of object creation.
Step
5 - Running the Program:
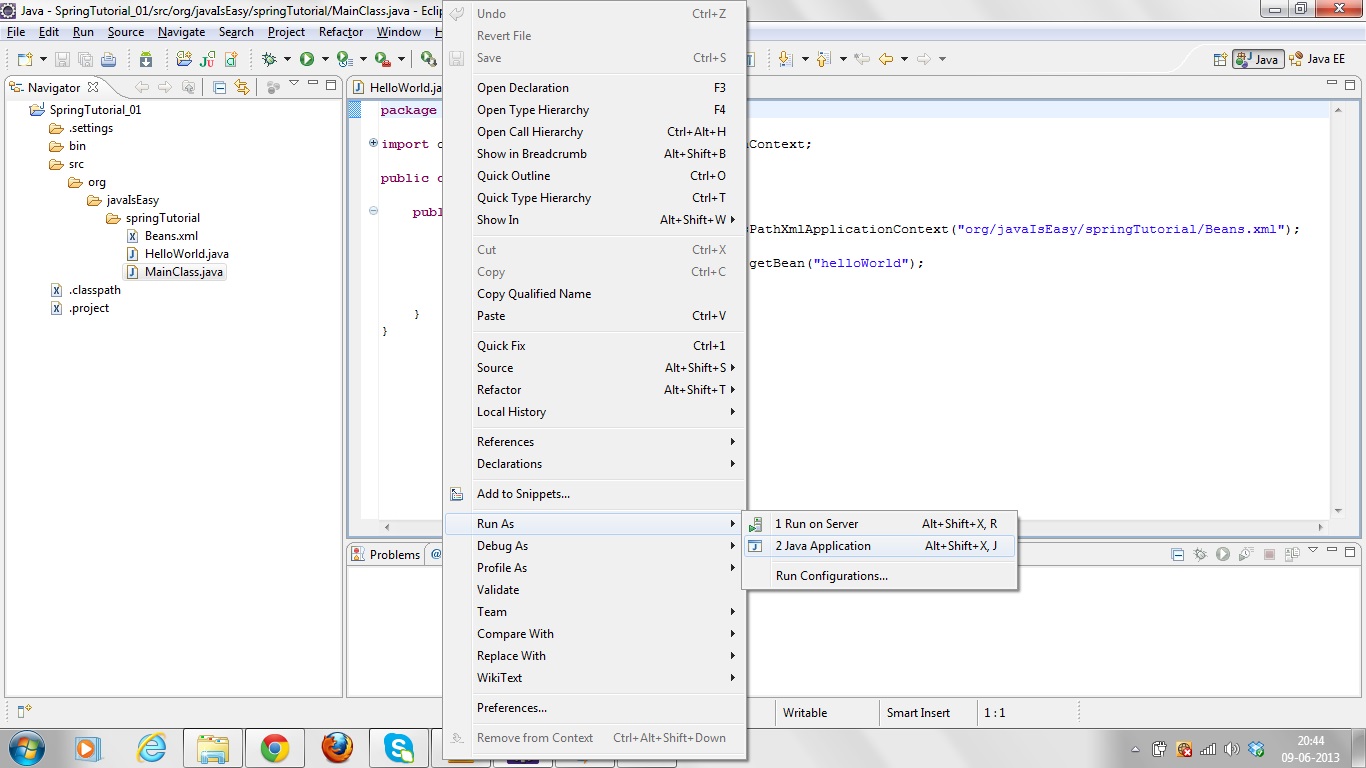
Let's run this program and see what
result would be coming.
************************************************************************************************
OUTPUT : Your Message : Java Is Easy
!!
************************************************************************************************
Congratulations, you have created your
first Spring Application successfully. You can see the flexibility of above
Spring application by changing the value of "message" property and
keeping both the source files unchanged. Further, let us start doing something
more interesting in next few chapters.


It is so nice article thank you for sharing this valuable content.
ReplyDeletemule 4 training
learn mulesoft